DIY Terrarium
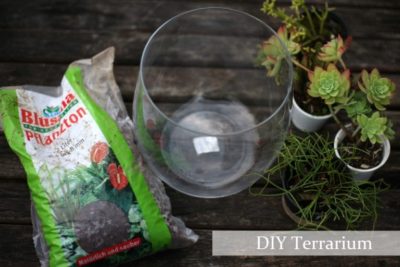
I always wanted to make a Terrarium. So the holiday season was a perfect opportunity to test my skills.
The trend of DIY Terrariums is on for a while now. You can see tons of them at florists at the moment but why don’t make one on your own? It’s pretty simple, honestly, and looks super professional. 🙂 Also there’s nothing better than a personalized DIY gift, right?
So let’s start with a list of Materials:
- Succulents (pick which ever you like best but they must be small)
- Clear Glas vase, jar, bowl ( I like high, round ones)
- Cacteen soil (I think Home Depot sells that too)
- Clay pot pieces, or clay balls ( used as a false drainage layer)
Tipp: Keep succulents and cacti together and keep fern and tropical plants together. They need a different amounts of water and soil.
Step 1: Imagen your Terrarium
Imagine how you want to arrange your plants inside the vase. Maybe test it out see how well they will fit.
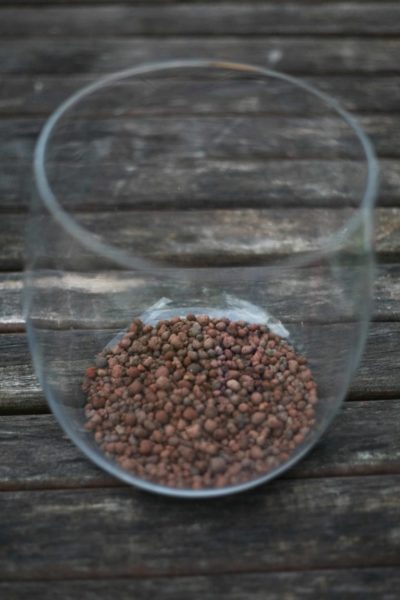
Step 2: Insert Clay pieces
Fill your vase wit the clay pieces until you can’t see the bottom anymore.This is to create a false drainage layer so water can settle and not flood the plants.
Step 3: Insert Plants
Arrange the plants the way you like them best. If they’re too long don’t worry you can just cut of a pieces and stick it in the soil. That’s the great thing about succulents. It wil just get roots and grow back! Remember to keep your plants away from the edges or they might not have enough room to grow.
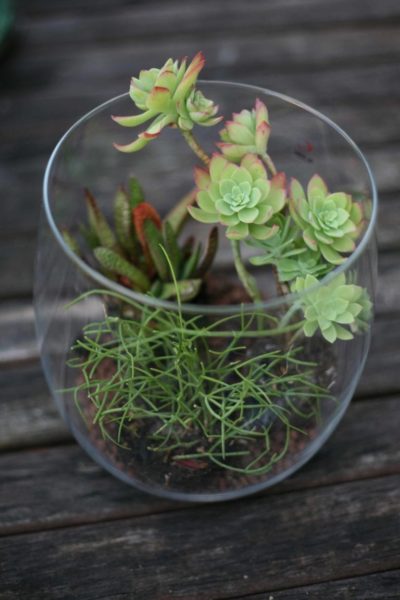
Step 3: Add soil
Carefully add soil. If some of it lands on your plants just brush it of with a paintbrush. Add as much as you need to cover the roots. I also cut of one of the branches of my succulent that stuck out too much and just stuck it back into the soil.
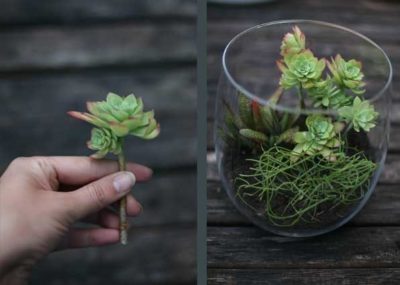
And you’re all set! Wrap a bow around it and make someone happy (Or just keep it) 😉
Just remember to keep it in a nice light space so they get enough sun. You hardly ever need to water it since succulents hardly need any water. All you have to do is pick out the dying or wilting leaves so it keeps looking nice and clean and to maintain the health of the little eco system. If a whole plant dies, take it out as well.
You can also add all kinds of little decorations. For example if you give it too a superhero fan add a plastic figure of his favorite character. The overall costs are around 15$ depending on where you get your supplies from. You can find gorgeous vases in thrift stores like Goodwill for a couple of bucks.
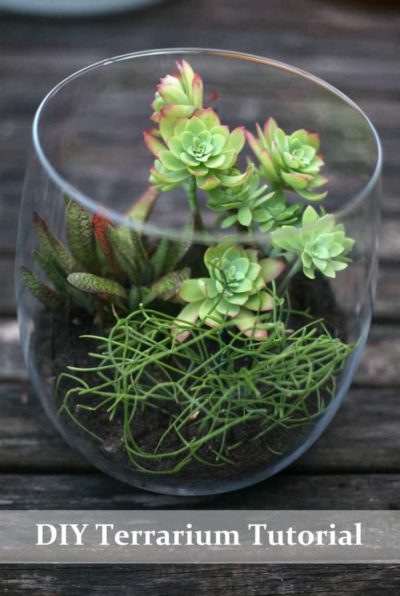
My Terrarium even started blooming after a week or so. What a great surprise! Seems like I have a green thumb for Terrariums. 🙂

Und hier nochmal in Deutsch.
Ich wollte schon immer mal ein Terrarium machen. Der Hype darum ist ja schon lange im Netz und jetzt zu Weihnachten dachte ich mir es wird Zeit es mal auszuprobieren. Und es ist ja auch nebenbei eine ganz schöne Geschenkidee.
Hier erstmal eine Materialliste:
- Succulenten ( welche auch immer Ihr am schönsten findet)
- durchsichtige Glasvase
- Tonstücke (damit die Plfanzen nicht zu nass werden)
- Kakteenerde (gibts im Baumarkt)
Schritt 1: Planung
Stelle dir vor wie du die Planzen arrangieren möchtest. Stelle sie probeweise mal in die Vase um deine gewünschte Anordnung zu finden. Die Pflanzen dürfen nicht zu nah am Rand sein, da sie sonst nicht genug Platz zum wachsen habe.
Schritt 2: Tonstücke einfüllen
Zuerst muss der Boden mit den Tonstücken befüllt werden bis man den Grund nicht mehr sehen kann. Falls versehentlich später mal zu viel gegossen wurde nehmen die Tonkugeln das überschüssige Wasser auf, sodass die Planzen nicht ertrinken.
Schritt 3: Pflanzen einsetzten
Jetzt werden die Pflanzen so eingesetzt wie man sich das in Schritt 1 überlegt hat.
Schritt 4: Erde reinschütten
Sobald man mit den Pflanzen zufrieden ist füllt man mit der Kakteenerde auf bis die Wurzeln bedeckt sind. Wenn etwas auf den Pflanzen landet einfach runterbürsten z.B. mit einem Pinsel.
Und schon ist es fertig! Schleife drum und unter den Baum gestellt. Mach bestimmt einen tollen Eindruck! Das ganze kostet ca. 20 Euro und somit auch echt preiswert. Mein Terrarium hat sogar nach einer Woche angefangen zu blühen! Hab wohl einen grünen Daumen *lach* Viel Spaß beim nachbasteln!
Awesome! Thanks for sharing. I’ll definitely have to try this! 🙂
~Jen
This is a beautiful terrarium! I featured it on my blog: http://www.jadeandfern.com.
Oh thank you! 🙂
Great idea and coming soon again.
Cute terrarium. What is the bright green stringy succulent in the front?
Thank you Erin, unfortunately I have no idea. I bought those succulents on a flea market without a label.
Thank you I always admired these plants.
Thank you Evelyn for your nice comment 🙂